Maternity Lola Dress

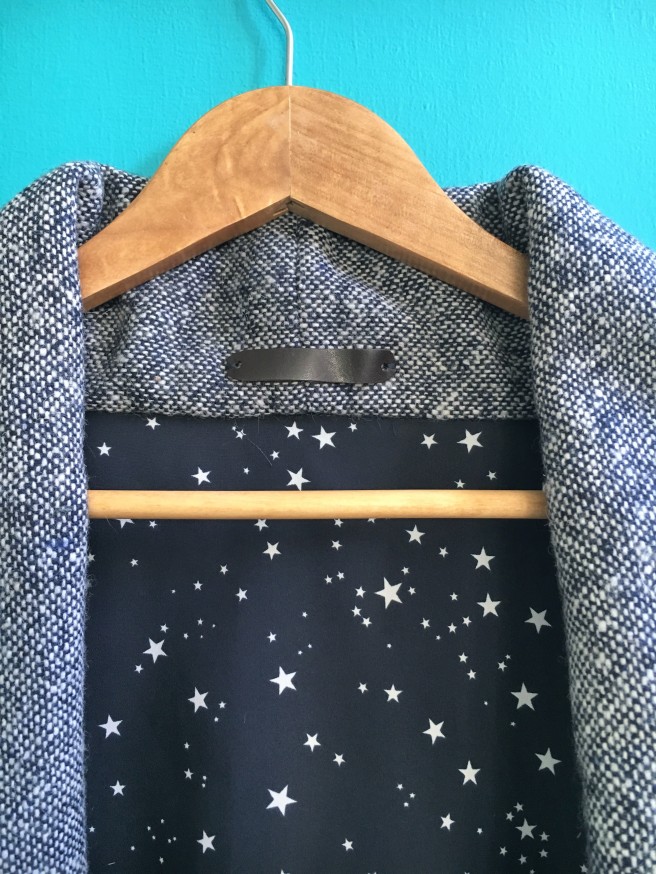
Hello! Again, it’s been a while. This year has been a lot, I simultaneously can’t believe that we’re already half way through and that its only been 6 months so far… I’ve hardly sewn anything this year, compared to my previous output, but I have managed to make a few necessary garments to get me through the winter with my third trimester bump. I’ve been really reluctant to make anything specifically for maternity wear, I hate the idea of a garment that will have such a limited lifespan. Instead, I’ve been trying to make things which I can easily adapt back to a non-pregnancy shape later, or which are just oversized enough to go over my belly. I’ve made a couple of long sleeved Mandy Boat Tee’s and a Jocko Sweater which fit into the latter category, but this dress is more the former:

P1040805

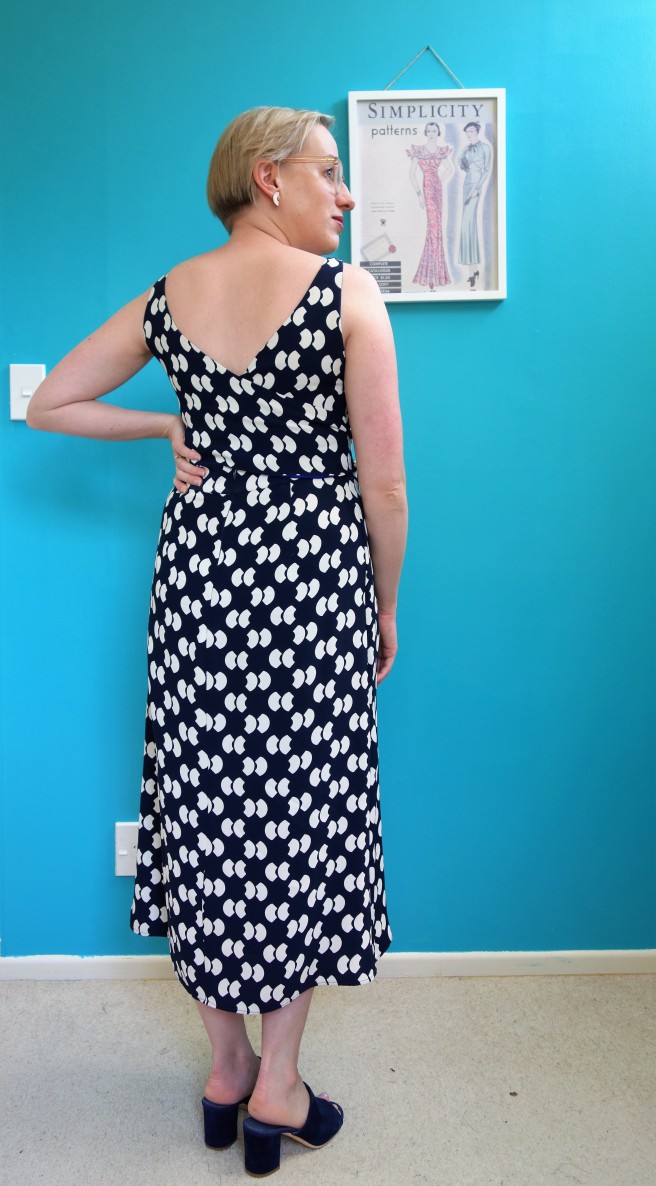
This is the Victory Patterns Lola Sweater Dress, a pattern which I’ve owned almost since I started sewing but which I’ve never got around to sewing until now! I really should have made it earlier, it’s a great pattern. Sewing it was so straightforward and fun, everything fitted together and matched up perfectly and it was just really satisfactory to make. I made this at the end of April, while we were in Level Four lockdown in New Zealand, and it was a perfect snuggly comfy dress to wear at home for six weeks!

P1040802

I didn’t need to do much to alter the Lola pattern for my changing shape, the curved waist seam and princess seamed skirt make it pretty ideal for maternity wear already! I raised the waist seam an inch all the way around, which to be honest I would have done anyway as the pattern is drafted for someone longer in the torso than I am. The only other change I made was to grade out to a size 16 from just below the waist seam at the front skirt seams, then taper back to the size 10 before the hem. The rest of the dress is all cut at a size 10. My plan is to nip that extra width out of the front skirt seams when I don’t need it anymore, which should hopefully extend the lifespan of this dress!

P1040801

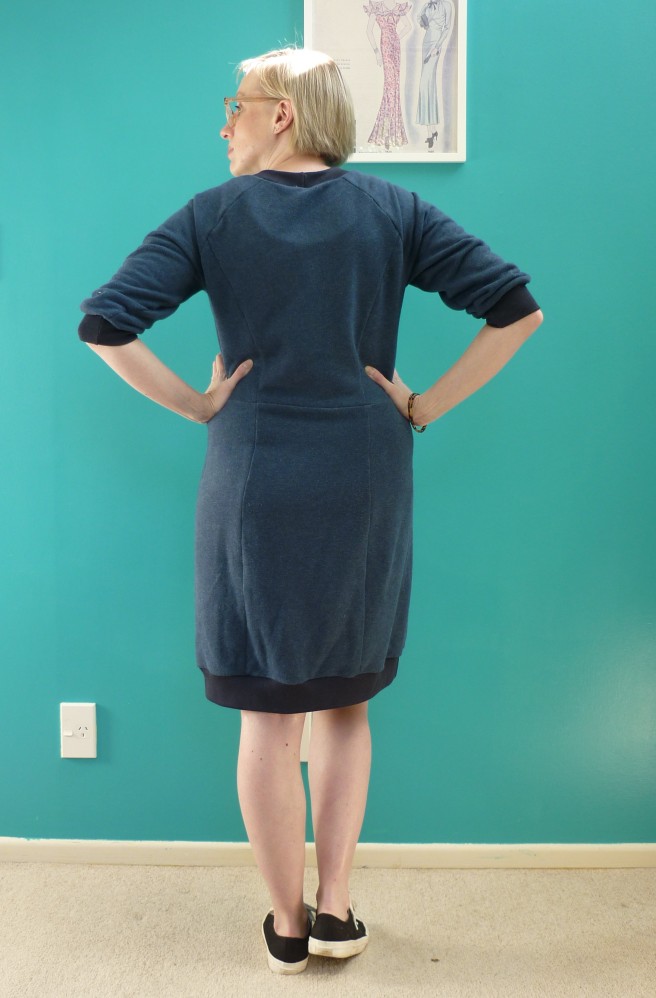
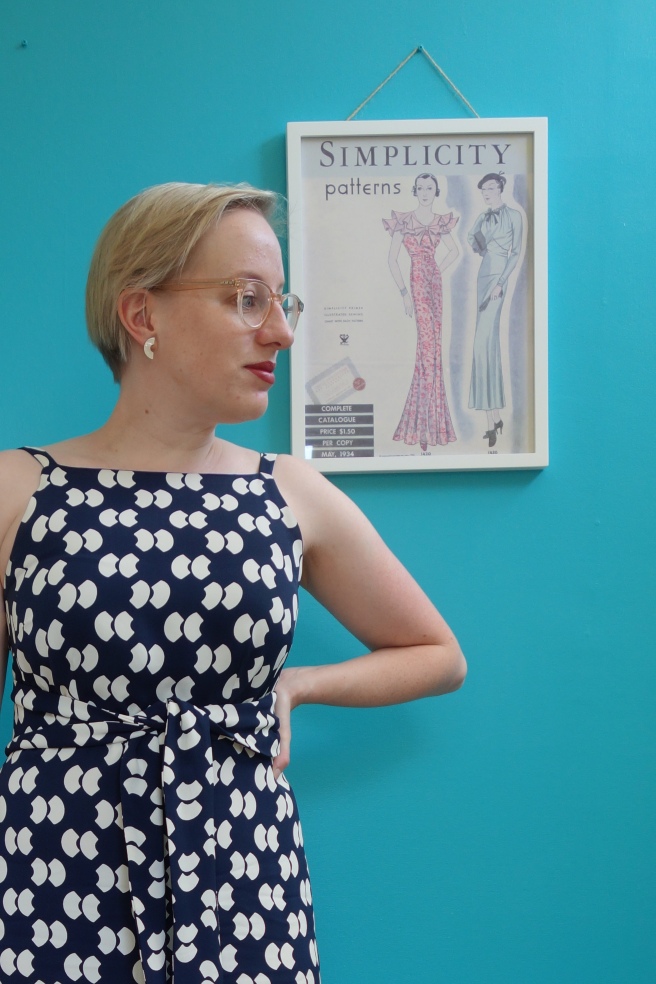
I used all stash fabrics for this project, as there was no online shopping in level 4! I used a fairly weighty cotton/modal french terry, which I originally bought from The Fabric Store to make something for Hamish, but he didn’t like the colour. So it’s sat and marinated in my stash for a few years, and I’m glad I pulled it out for this dress! It’s so soft and snuggly, and I like the colour matched with the navy ribbing I also dug out. It’s only flaw is how creased it gets, I feel like you shouldn’t need to iron a knit dress! I do wonder if the terry is a bit heavy when matched with this fairly strong ribbing, it’s a bit wavy and bulky looking at the hem band and sleeve cuffs. I’m planning to make another one in a bamboo terry, which is much drapier and softer, so hopefully I can get rid of some of that bubbling next time!

P1040800

Because of the weight of the french terry I didn’t add the enormous side pockets that are a feature of this pattern, but I do miss having pockets in this dress! The lack of side seams mean that there isn’t really anywhere to put more subtle ones, but maybe when I modify the skirt for post-partum wear I can look at putting some into those skirt seams…

P1040806

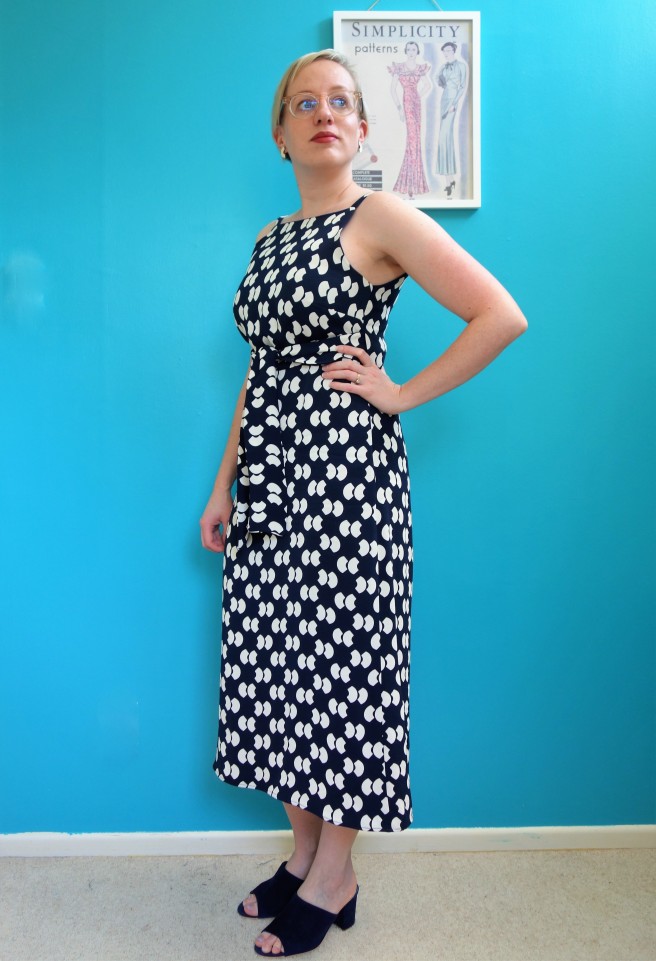
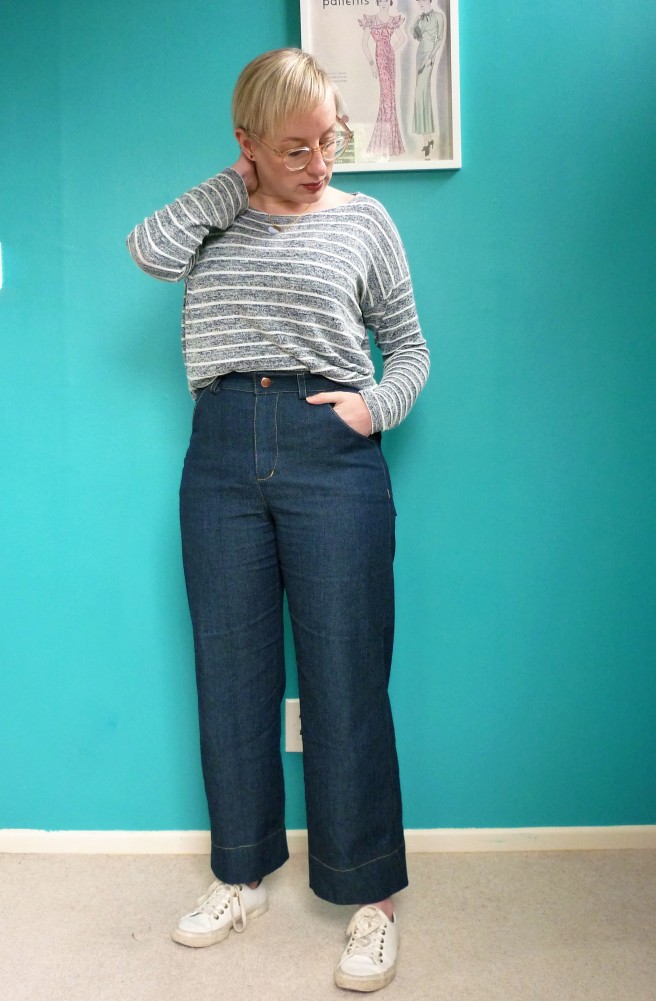
I took these photos a while ago, when I was around 25 weeks pregnant, but I’m still getting plenty of wear out of this dress thankfully! There’s less room in there now, but it should last me for another six weeks…

Axis Dress

Hi, hello! It’s been a while, things were looking very different around here last time I blogged about anything. In fact, it’s been nearly six months, the longest break I’ve had from blogging since I started six years ago. My hiatus started towards in December, when everything got busy for Christmas, and then continued as the beginning of my year was consumed by constant bouts of (all day) morning sickness, where I could barely be bothered to drag my sorry self off the couch, let alone into my sewing room. And then, just as I’m starting to feel like a human again, we’ve all been tipped into this bizarre, scary, unnatural new world of self-isolation and social distancing, which hasn’t helped with my motivation to sew at all! Even though I’m an essential worker, and would ordinarily be at work in the operating department with all of my colleagues, I’ve been told I can stay home for the 4 week long national lock-down period that New Zealand has been observing for most of April. There’s not a lot of information or evidence around Covid-19 and pregnancy yet, and I appreciate how lucky I am that I’ve been given the chance to stay safe at home. I’ve been working on a few new sewing projects, partly out of necessity- things are starting to get pretty snug over my 22 week bump, and partly just to do something that feels like a part of my old, normal life.

This dress is one which I made to wear to a wedding last November, which I had intended to re-photograph before posting, but I’ve missed my chance and it doesn’t go around me anymore! It’s a Papercut Patterns Axis dress, my favourite from their most recent Geo collection.

DSC01101

The fabric is one of my favourite pieces I’ve ever bought, it’s a Japanese rayon crepe from The Fabric Store. Because I love it so much, and because I know that Papercut bodices aren’t usually a great fit for my body straight out of the packet, I took the time to do a muslin to check the fit of this pattern. And I’m really glad that I did! It took me three bodice muslins before I was happy with the fit. With the help of my friend Lauren, we draped two new darts, one at the bust and one at the armhole, and then rotated the armhole dart out. We also shortened the waist on the bodice, and lowered the neckline, and shifted the waist darts in  towards the centre front. I thankfully remembered to carry the length adjustments over to the beautiful wrap-around back!

DSC01104

Look at that lovely back detail!

I sewed the version with the A-line skirt without the centre front split, as I thought this swishy rayon deserved a little bit of volume in the skirt. I had intended to shorten it a few inches, but when I tried it on I decided I really liked the midi length it was drafted at. I struggled to get the hem level, as there isn’t anything holding the back half of the skirt up except for the waistband it dips a bit, and looks longer even though it’s actually the same length. I couldn’t decide if I should trim it shorter so that it matched when I was wearing it, but I think it’s fine. I’d rather it was a bit longer than ended up a bit shorter, which was my worry!

DSC01102DSC01098

I’m really pleased with how the fit turned out, I felt really secure in the bodice even though I only knotted the ties together once. I think if I make it again I might decrease the width of the ties a bit and lengthen them, so that I have enough for a bow without it being too bulky, especially if I choose a linen or slightly crisper fabric than this fluid crepe. Because of the general wriggliness of rayon crepe, and it’s propensity to grow unexpectedly,  I decided to line my bodice in some lightweight rayon challis that I had in my stash. This meant that I had to cut a self fabric facing for the ties, so that you wouldn’t see my non-matching lining on their wrong sides, but that was simple enough to do.

DSC01119

I finished the dress off with a “Hello, Gorgeous!” label from Kylie and the Machine, it’s so cute. It was a lovely dress to wear on a hot day for our friend’s wedding down in Blenheim, in what feels like much more frivolous times! I hope that you’re all coping okay with whatever your current situation is, and that you’re finding some escape in crafting (or being a crafting voyeur, as I have been!).

DSC01114

(I was so excited to realise that I had these matching earrings!)

Zadie for Summer

Recently I’ve been sorting through my sewing stuff, sorting out my patterns and notions and especially my fabric. I spent a weekend sorting through what I had, taking all of my fabric stash out of it’s bookcase and refolding what I wanted to keep and setting aside what I wanted to sell at the next Fabricabrac. It was a really useful exercise for me, not only did it feel good to have a clear out and a tidy up, but it reminded me of some of the absolutely beautiful fabric that I’ve let sit in my stash, some of it for years! Sometimes I’ve just been waiting for the right pattern, but sometimes I’ve just held onto lengths of fabric because they’re special- I’ve bought them on holiday, or got them from a friend, or some other sentimental reason. I’ve had to give myself a bit of a talking to, I’ve bought this fabric to make clothes with, I’ll love it even more as a garment than folded in my shelf!

IMG_2967

This fabric is one of those special pieces, I bought it from Raystitch in London when we were over in the UK two years ago. It’s a Sevenberry indigo dyed Japanese cotton, and I just adore it! I bought two lengths of Sevenberry fabric at Raystitch, the first piece became a V1247 skirt shortly after we came home, but I was just not sure what to use this piece for so it’s languished in my stash ever since.

IMG_2973

It’s a lovely weighty cotton, with a fairly crisp hand but which also has a slubby, gorgeous texture. I’m definitely going to buy more if I see it again! I also really love the cross-hatch pattern, it’s one of the few patterned fabrics that I can imagine wearing top to toe like this.

IMG_2970

The pattern is, of course, the Zadie Jumpsuit, darling of the indie pattern world this year! This is the second time I’ve made this pattern, the first one I made using a lightweight brushed chambray with sleeves, which got a lot of wear through autumn and then again this spring as a layering piece (technically this is actually the third time I’ve used this pattern, I also made a top for Frocktails using it!). I wanted to make a short sleeved version of Zadie for summer, but I was initially thinking of using a linen or a drapier rayon or something. I didn’t think I would have enough of this narrow width fabric to squeeze a jumpsuit out of it, so I kept dismissing it as an option. Finally I decided to just lay it out and see if I could squeeze it on, and I was stoked when I just about managed it!

IMG_2975

I wanted to use the facing pieces I drafted for the neckline of my denim version, which was just as well because I’d never have managed to cut the matching bias tape to finish it otherwise! I couldn’t squeeze the whole pocket pieces onto the fabric, but I was able to cut a pocket facing in the main fabric to sew onto a pocket bag made in another cotton, which has worked out pretty perfectly. I ended up with only the tiniest pile of scraps left over from my 2.5m of fabric, which was very satisfying but also slightly disappointing, as I was hoping I would be able to squeeze a zippered pouch or something out of the leftovers! I made exactly the same adjustments to this one as I did my first version, cutting the back bodice on the fold and shortening both the bodice and the rise of the trousers to fit my short body.

IMG_2982 (1)

I absolutely adore this jumpsuit, it’s ended up being such a perfect pattern and fabric match. The weight of the cotton and the amazing drafting of the wrap front means that it feels perfectly secure, and I’m not worried about it shifting around on me while I’m wearing it. It also shows off the great shape of the trousers! I can imagine it getting a huge amount of wear over the summer, it’s already taken me to a social sewing cocktail evening and my work Christmas lunch (I’m really not ready for Christmas stuff yet!). I’m so glad I finally cut into the fabric!

Frocktails 2019!

It’s been over a month, but I’ve finally got around to getting some photos of my outfit for Wellington Frocktails! I had a great night at The Library bar, drinking delicious cocktails and meeting more lovely local sewing folks, but I definitely had a bit of a torturous lead up to the night, with my carefully made plans getting scrapped and reworked a few times before I was happy with the end result…

P1040776

As you can see, I went for subtle and understated! I had wanted to make a gold sequinned skirt for a while, and Frocktails seemed like a perfect excuse. Initially I was going to make an Evie Bias Skirt, but I ran into a problem immediately…the netting the sequins are sewn onto technically doesn’t have a grain or a bias, so which direction should I cut it out?? I held the length up against me in several directions, to see which direction had the best drape, and then cut it out along that line. I sewed it up, and added the elastic waistband, but I really wasn’t happy with the way it was sitting. The A-line shape of the skirt which looks so beautiful in a fluid fabric just looked wrong with the sequins, with the side seams collapsing under the weight of the sequins in a sad, wrinkly mess.

P1040784

I ended up trimming pretty much all of the shape out of the skirt, ending up with a basic column shape with a small amount of shaping over the hips to the waist, which is still finished with scalloped elastic the way the Evie instructions suggest. To sew the sequins I used a long stitch length and a heavy duty denim needle, and just mowed over the top of any sequins which got in my way! I catch stitched the seams open and rolled the hem by hand, which took about 15 times longer than the rest of the skirt construction combines, but which definitely made the seams look better than bust finger pressing them open.

P1040774

I considered lining the skirt, but decided in the end to just wear it with a slip. Those sequins are scratchy, I definitely wouldn’t suggest wearing them against your skin! Luckily my top is made in a beautiful soft viscose twill, which felt lovely and also stopped any rogue sequins which might have been annoying around my waist. The fabric is actually left over from my swishy Flint Trousers from two years ago, I had about 1.2m left after some creative cutting out!

P1040783

The pattern is the Zadie Jumpsuit bodice, with some serious slashing and spreading of the sleeves for some volume and drama! To convert the Zadie bodice into a top I sized down three sizes from my jumpsuit, and then removed the pleats from the back piece. I also added 3 inches onto the hem, though next time I would add a bit more to endure it would stay tucked in! I slashed the sleeve pattern piece from the hem to the stitching line of the sleeve cap into 5 sections, and then spread them apart to add 20cm of width at the hem. I then gathered them back onto a bias cuff piece. Catherine at Thread Snips has a much better tutorial for doing this than my janky explanation above!

P1040781

Even though I had a number of changes to my initial plan, I’m really happy with my final outfit! The top was lovely to wear, and the sleeves were a really fun departure from my usual style, while the sequins obviously gave maximum impact for a very basic garment! I’m a bit sad I didn’t get the swishy, swingy sequinned skirt I had hoped for, but it still turned out pretty well. I might need to look for some smaller sequins on a silk backing rather than this nylon netting…Though given how far I’ve managed to spread loose sequins throughout the house, it might be a while before I can stand to sew with them again!  I definitely want to play with some more voluminous sleeves for summer, I just need to get over my dislike of gathering first…

P1040777


Pietra’s (part one)

Wow, its been a few weeks! I’ve been sewing a whole bunch, but finding the motivation (and the time) to take photos has been a bit tough. But this weekend was sunny, and I managed to get photos of a few things that have been waiting for a while, as well as a few queue jumpers!

P1040786

First up is a pair of Closet Case Patterns Pietra Pants, fresh off the sewing machine! This is view B, the pegged version, made up in a striped cotton twill from my stash. First things first: they haven’t photographed very well! I couldn’t get the narrow stripes on this fabric to come up in a way that wasn’t hypnotic, so I’m sorry if you can’t see them very clearly…

P1040788

Bamboozling as the fabric looks on screen, I think they look pretty great in real life! I’ve got metres of this fabric, it was from one of The Fabric Warehouse’s Pop Up sales a few years ago and I’m glad I’ve started making a dent in it. I considered playing with the direction of the stripes on the pockets and waistband, but decided to keep it simple and have all of the stripes horizontal. This twill is a lovely weight for this pattern, its not too crisp or bulky with the elastic in the back, but still feels heavy enough for Spring trousers.

P1040792

Now, to the pattern! I sewed this version as a toile, before I cut into the lush viscose/linen blend I have from Blackbird Fabrics, and the fit is so great. I took 1/4” off the rise at the CF, and that is all. Everything else is as drafted! I’ve got a couple of wrinkles under the bum, and I could take a little bit more length off the centre front seam, but other than that I think they’re pretty perfect. Even the length is as drafted, surprisingly! I may actually add an inch or so to my next pair, just so that I can cuff them if I want to.


P1040797

The waist is super high, and I love it! The lack of waistband paired with the interfaced facing at the front make them really comfortable, and the pockets aren’t too bulky and are nice and deep. They’re just a really comfy, easy to wear pair of trousers, exactly what I’ve been looking for! I was a bit worried that the 2 inch elastic in the back waist would be too wide, but it feels fine and I actually like the way it looks when it’s all topstitched. I did have to steam it pretty heavily once I had finished sewing over it to get it to spring back to its original length, but that seems to have been successful!

P1040791

P1040794

I’ve also got a new tee shirt! This is a knit Scout Tee, made up in a linen knit from The Fabric Store. I’ve never sewn linen knit before, and once I managed to figure out how to straighten the grain on my piece of fabric (it came out of the wash like a parallelogram)  it was pretty easy going. I definitely made sure to stabilised the shoulder seams, and used wash away stabiliser to ensure the hems didn’t get stretched or tunneled as I ran it through the cover-stitch, but other than that… For the pattern I did the same thing I did for my first knit Scout, and sized right down to the smallest size in the pattern. I really like the length and shape of the sleeves on the Scout pattern, they’re a super cute length!

P1040798

I’m really happy with both of these garments, and I’m even happier that its getting warm enough to wear them! You’ll definitely be seeing more of both patterns around here this summer…

Spring-ish Lander Pants

Hi team, happy spring/autumn! Not that it feels like spring in Wellington at the moment, my weather app tells me it feel like 4 degrees outside currently, and I believe it…though we have had some absolutely beautiful spring-like days recently, so I’m not going to complain. I’m definitely looking forward to some consistently warm weather though! I’ve been planning out some sewing to get me through this transitional period, and top of my list was some new trousers. I love my Ginger Jeans and my Safran Jeans, but by the end of winter I am genuinely sick of seeing them. I had plans to make the Closet Case Pietra Pants, but I needed to prewash the fabric, and it took a couple of days to get dry this week as it’s been so cold (the lesson here is to prewash and dry your fabric as soon as you get it, not just before you want to use it…). As it was hanging in the laundry, I pulled out some already pre-washed denim and decided to make the 1970’s inspired Lander jeans that I’d been thinking about all winter.

P1040760

I’m not sure where this denim came from, it’s been sitting in my stash for years! I had about 3.5m of it, so I suspect it may have been from one of The Fabric Warehouse’s sales. Its a nice weight, on the heavy side of medium, and I love the mid-indigo blue. It has a little bit of stretch, so I suspect it was bought for another pair of Ginger Jeans! I have plenty left over, so that may still happen. I think it’ll age nicely, it feels like it should soften up and wear in like the other denims I’ve bought from TFW. All of the fabric and hardwear for these came from my stash, which is awesome. I despair at the amount of stuff I’ve accumulated over the years sometimes, but other times I love that I generally have everything i need for a project on hand!

P1040759

Obviously I’ve made a few changes to the Lander pattern, I’ve got rid of the exposed button fly and swapped the patch pockets for internal pockets with a pocket stay. I love the look of the exposed button fly, but I hated the way it pulled on my first pair of linen Landers. It was also a pain to get in and out of! I think a zip fly is more practical, and also sits nice and flat which I prefer. I didn’t buy the zip fly expansion pack, I just used the fly pieces from the pattern and subbed in the instructions from a fly zip tutorial and it’s turned out great. The pockets were a bit more of a fiddle to hack, I copied the general shape of the pocket pieces from the Ginger jeans to get the pocket stay (the Curvy Sewing Collective have a tutorial on how to do it here!), and then cut the shape of the pocket opening from the front piece. I also added a piece of denim to the top of the pocket piece rather than having the whole piece cut from denim to minimise the bulk. Both pieces of the pocket bag are made from a scrap of rigid cotton chambray, its lovely and soft across my tummy!

P1040748

I really love these pockets, the pocket stay makes it feel like there isn’t too much stress on the zip (these are drafted to fit  pretty tight across the hips!), and it also means that the pockets are big enough to fit my phone and my hands in at the same time! The holy grail of pockets, in my opinion. The back pockets on the Landers are also huge, giving me so many options for places to stash things. They’re basically like the Mary Poppins carpet bag of trousers! I slipped another one of my favourite Kylie and the Machine labels into the topstitching of one of the pockets, I love it…

P1040770P1040753

It’s funny, until I saw pictures of my in these I thought they were so much wider than they actually are! I think I must be so used to skinny jeans that anything else feels very breezy. I think these will be a great option to get me through until the warm weather arrives, the slightly cropped length (I took an inch off the full length version and then turned the hem up 3 inches) means I won’t feel silly wearing socks with them but can also wear them without if its not too cold!

P1040756

I’ll also briefly talk about my top, I’ve finally climbed aboard the Mandy Boat Tee train! Actually this is my second attempt at this pattern, I tried it a few years ago when it was a single size, and it was hugely too big for me. When Tessuti re-released it with 4 size options I thought I should try it again! This is the size 2, with a few inches off the bottom so that I could fit it onto an odd length of jersey knit from the stash. I love this yarn dyed stripe, its lovely and drapey and soft, and I think it works well with this pattern! I’m glad I gave it another go, it was a really quick sew, even with stripe matching. And it’s a free pattern! I am glad I remembered to put a ‘This is the Back’ label into the back neckline before cover stitching it down, otherwise I’d be getting it wrong constantly…

P1040755

Well there we go, the first of my spring sewing! Hopefully I’ll get those Pietra Pants sewn up soon…


Boxy Tee Files: Cielo Top

You might have noticed that I’m a big fan of a boxy woven tee…from the Grainline Scout to the Marilla Walker Maya tee, via the Peppermint Magazine Harvest tee and a few big 4 versions, I’ve tried a lot of patterns! The Cielo pattern from Closet Case Pattern’s Rome Collection immediately caught my eye, and it wasn’t until I made a muslin of the dress that I realised that the tee variation could also be a great addition to my wardrobe.

Photo 9-08-19, 3 50 53 PM

This pattern has so many details I love in a tee! I love the scooped shape of the neckline, and the set in sleeves with the little cuffs, and the cropped length means its perfect to wear with high waisted bottoms. I took an extra 5/8” off the hem, to account for my short torso, but I was pretty stoked with the fit aside from that! I use the C cup bodice for my dress muslin, but I decided it felt too big across the top of my chest and through the armscye. I know the armscye is supposed to be dropped and pretty oversized, but the one in the C cup bodice felt just too big, even though I had gone down a size from what I usually make in Closet Case Patterns. For this tee, I just went back to the size 8 in their standard bodice draft, and I’m really happy with the fit.

Photo 9-08-19, 3 49 07 PMPhoto 9-08-19, 3 48 17 PM

I was hoping that this would turn out to be a very wearable muslin, so I used the left over linen from my first Wiksten Haori. I love this colour, its so good! I had juuuust enough left to cut the tee out, with only a satisfyingly tiny handful of scraps left over. This pattern is a great scrap buster, the panels on the back shoulders and the cropped length means that you can squeeze the pieces out of some weirdly shaped left overs!

Photo 9-08-19, 3 51 01 PM

I wanted to use some hand stitching to highlight the shoulder panels, so I dug out some similarly coloured embroidery floss and did some crude sashiko stitching on one shoulder. It’s pretty wonky and uneven, but I cant see it when I’m wearing it so it doesn’t bother me too much! I should probably have made it more random rather than trying to have neat little rows, but at least I know for next time…

Photo 9-08-19, 3 41 22 PM

This is definitely not the last time you’ll see me making this pattern! I’ve already got another one cut out which will hopefully be part of my Frocktails outfit, plus I’m hoping to make another version of the dress for summer. I’ve got a pair (or two) of the Pietra Pants planned as well! Wish I was actually going to Rome, but sewing up the collection will have to do…

Photo 9-08-19, 3 49 20 PM

Winter Wiksten Unfolding Jacket

Note: I’ve been paying attention to the current conversations happening on social media about cultural appropriation and violence towards Asian communities. Since making this garment my understanding of cultural appropriation has grown and I now see how the naming of this pattern is problematic, and is a form of cultural appropriation. The pattern has since been renamed The Unfolding Jacket, and the pattern is currently not being sold until Wiksten decide the best way they can proceed with it. I’m considering other courses of action I can take, including removing these blog posts all together, I welcome any suggestions people might have regarding this. I’m very grateful to the people on social media who have done so much work to educate and inform me about these topics

A couple of weekends ago I hosted a sewing day at my place with my friends Gabrielle and Ruby. We sewed, we ate pizza and cheesecake, and my cats were total antisocial arseholes, it was great! I used the day as a chance to tick another item off my 2019 Make Nine list- another Wiksten jacket. I wore my linen version all summer, and I was really eager to make a warm winter version. And it’s such a quick sew that I knew it would be a good thing to make during a single sewing day!

Photo 9-08-19, 3 34 28 PM

I made the same size as my linen version, but decided that the mid length variation would be more practical for a winter garment! I also used the full width collar, unlike the linen version where I made the collar a half width. I really like how huge and cuddly the big collar is.

Photo 9-08-19, 3 34 47 PMPhoto 9-08-19, 3 34 56 PM

I used a great length of navy and white wool tweed from my stash, which was originally given to me by another sewing friend who had already cut a project out of it. I thought I might not have enough fabric, but after a bit of pattern tetris I managed to squeeze it all on! It’s deliciously heavy and warm and wooly, though it does get that classic wet sheep smell when it gets wet (reminds me of school assembly in the winter…). For lining I used some poly crepe de chine from The Fabric Store. Usually I wouldn’t go for polyester, but I love a good star print, and this one feels pretty nice!

Photo 9-08-19, 3 35 05 PM

Photo 9-08-19, 3 37 47 PM

I stuck a whole bunch of extra little details on this jacket, it was fun sorting out a whole lot of bits and pieces! I added a scrap of leather for a hanging loop, and added a double pocket to one side. I liked the way the overlapping pockets looked on the pattern piece for the front piece, so I just added the smaller pocket from the short version as well as the larger pocket from the longer version. The tweed had a lovely orange selvedge, which I wanted to make use of, but I ended up only managing to get it onto the top edge of one of the smaller pocket. I do like the way they look! The smaller pocket is a great size for my phone too. On the other side, I added one of my favourite Kylie and the Machine labels, the delightfully snarky “You Can’t Buy This” ones.

Photo 9-08-19, 3 39 20 PM

Photo 9-08-19, 3 39 47 PM

I’m really happy with my new jacket! It’s so lovely and warm, but is also really easy to throw on over just about anything, like its linen sister. It’s certainly getting a lot of use, now that winter is here in full force!

Photo 9-08-19, 3 35 12 PM

Wedding Sewing

It’s been six months (six!) since Hamish and I got married, so I figured it was about time I posted about the wedding sewing I did before I forget completely! I started out at the beginning of last year thinking that I would make not only my dress, but also dresses for my three bridesmaids. Once I started working on my Masters research project I dropped the idea of making any dresses pretty quickly, between my project and working I didn’t have masses of free time! I wanted to make something to wear though, and once I picked out my dress (from local bridal designer Sally Eagle), I started to have a think about what I could make to complement it.

K&H-Print-3

I decided I would make a top to wear over my dress, as it was pretty much backless and I thought I would want some coverage for post-dinner dancing at the least. But I has also tried on a lace over-bodice when I tried on the dress, and that looked so pretty…So I ended up making two tops, obviously!

IMG_0717

For the first top (what I started to jokingly call my “ceremony look”) I used some beautiful chantilly lace, which I first saw at Silk World when we were in Melbourne last year. Unfortunately, they only sold it in 3m lengths, and I really only wanted a small bit because it turns out lace is pretty expensive! Luckily I found the exact same lace the next day at Tessuti, and they were quite happy to sell me a 1.2m length (though it doesn’t seem to be on their website anymore).

IMG_0719

I wanted a princess seamed bodice with a high front neckline and an open back and capped sleeves. I decided to start with the By Hand London Elisalex bodice, because I knew it fit, and I’m much happier hacking a neckline than trying to fluff around with sleeves! I traced on the front neckline from the By Hand London Anna dress, and slashed the back neckline from the shoulder to the waist. After a muslin, I took a bit of extra length off the long edge of the open back, as it was gaping a bit, and I widened the neckline a touch. And then, I took a deep breath and cut into my beautiful lace…

IMG_0722

I spent a long time trying to maximize the pattern placement on the bodice. I especially loved this lace for its delicate floral motif, but also because it had two scalloped selvages. One was a small regular scallop, the other was a more ornate, eyelash-y edge. I decided to use the large scallop along the sleeve hems, and I trimmed the small scalloped selvage off completely so that I could hand sew it around the neckline once it was sewn together. That left me with a pretty big amount of fabric to fit my pretty small pattern pieces onto, and I managed to match the floral motifs across the princess seams front and back pretty well! To finish the hem I sewed a strip of bias tape I made from the same silk crepe de chine as my dress, so that I could tie it closed and it would hopefully blend into the waistline of my dress.

K&H-Print-33

Because lace doesn’t fray, I was able to get away with some pretty dodgy sewing techniques when I was sewing this! I used a microtex needle and standard thread, and the sewing was easy enough. The reason I wanted princess seams was so that I didn’t need to have the large triangles of the dart showing through the lace, and to make all the seams as unobtrusive as possible in a sheer fabric. I ended up sewing the seams as usual, then topstitching the seam allowances to one side at 1/8”and trimming the rest of the seam allowance right back to the topstitched line.

K&H-Print-52

In the end you could barely see the pattern matching against the ivory of my dress, but I’m still glad I went to the effort! I really love how delicate and ethereal the lace turned out, it definitely added a bit of romance to my otherwise plain dress (which I love! I wanted something minimalist, and I definitely got it!). As pretty as this top turned out, it didn’t really solve my original problem of having a bare back for dancing and partying later on… Which is where the second top came in!

IMG_0723

This simple little shell top was inspired by this two piece Anthropologie wedding dress which kept popping up on Pinterest when I was obsessively looking for ideas. We don’t have Anthropologie here, but I was pretty sure I could make something close enough! I was lucky to be able to buy a length of the same ivory crepe de chine as the rest of my dress from Sally Eagle, so that was a great start. I started with the cropped version of the Grainline Willow tank, and traced on a boat neckline similar to the shape of the first top. Because the silk is so fine and floaty, I ended up lining it completely with self fabric. This took away the problem of finishing the neckline and armscyes with facings or bindings, both of which would show through. Instead I trimmed the seam allowances pretty short with pinking shears to reduce their bulk, and then they were all enclosed in the lining. I finished the bottom with a machine rolled hem, incorporating both layers.

IMG_0726

You know I can’t resist a button up back! I found these gorgeous wee vintage glass buttons at Miss Maude, and I had to get them. They’re possibly a bit heavy for this fine silk, but I reinforced the centre backs with strips of organza to help stop the back from buckling. The roleau loops were actually easy to make, the lightweight silk was pretty easy to turn into little loops! One thing I really wish i had thought to do is add strap-holders to the inside shoulders, so that I could hook the shoestring straps of my dress into them and stop them slipping down my arms all evening!

K&H-Print-480K&H-Print-567

This little top was exactly what I wanted! It’s a much more modern and minimalist look than the lace, and I liked having the chance to change it up for the two halves of the day. I’m still impressed that I didn’t spill anything on either top (or my dress) all day, though the hem of my dress is pretty covered in grass and other farm-adjacent stains… I think I’ll be able to wear my reception top again with a bunch of things in my wardrobe next summer.

So this post has ended up being really long, thanks for reading all the way to the end! I’m definitely not a bridal seamstress, and I’m still not really sure if I approached these two projects in the most traditional way (especially the lace), but I’m really happy with how they both turned out, and I’m glad I was able to make something for my wedding day! I’m equally glad I opted not to make the actual dress, I would have stressed myself right out trying to get that done in time… Instead it was a pretty relaxed lead up to a lovely, easy, fun day with our favourite people, can’t ask for better than that!

K&H-Print-376

The photos in this post of me (and Hamish) were taken by the lovely Billie Brook out at Ohariu Farm, and I would really recommend both if you’re getting married in the Wellington region!


Paper Bag Princess

Did anyone else have the book ‘The Paper Bag Princess‘ when they were a kid? I loved it, that sassy, dragon tricking princess was a definite early role model! The book really has nothing to do with this blog post or my latest pair of trousers, other than the trousers having a paper bag waist…but I’m really scraping the bottom of the barrel for post titles at the moment! Anyway, its a great book, and this is a great pattern, so forgive the tenuous link. Moving right along…

IMG_2314

These awesome, 90’s-esque trousers are McCalls 7726, and I totally overlooked this pattern until I saw Ruby’s great versions. I’ve never had great luck with paper bag waists, they tend to look a bit weird with my short torso, like my boobs are emerging straight out of the ruffle! Luckily the proportions of this pattern work pretty well for me, I think the lack of a definite waist helps. There isn’t any elastic or anything, just the stitched down pleats and the sash, so its easier to keep them slightly below the smallest part of my waist. The pattern has several versions, and I chose the cropped, pegged leg version. I’m super keen to try the wide legged version for summer!

IMG_2303

IMG_2302

I used a lovely wool crepe from my stash to make these, and it’s lovely to wear! My previous attempt at making wool crepe trousers wasn’t so successful, because the fabric was a bit scratchy (and cheap, it got all pill-y), but this stuff seems much smoother and drapier, and isn’t at all scratchy, so that’s a relief! It does make the sash pretty bulky, but I’m feeling the drama of the big bow! I might get a ribbon or something to swap out with it if i want something a bit more streamlined. I used some scraps of Atelier Brunette cotton in those lovely deep pockets to cut down on bulk, and I love the little peek I get when I look down.

IMG_2321IMG_2327

It’s been ages since I sewed a big 4 pattern, but this one is really great. It did take me a while to sort through the acres of pattern tissue to find the right pieces, but once I had that sorted out it was a pretty simple pattern to put together. The instructions for the fly were a bit interesting, but I found that if I just looked at each step in isolation rather than trying to run through the whole lot in my head beforehand like I usually do then it was less confusing! I’m not sure if i’d do it that way next time, but it’s turned out pretty neatly.

IMG_2318IMG_2326

I’m super happy with the fit of these, it was just what I was looking for in a pair of pegged trousers. I really wanted an alternative to skinny jeans for winter, I find wide legged trousers too drafty in Wellington for winter! I also think these will be good for dressing up with heels and an ogden cami or one of my cropped tops, I’m looking forward to having a play around with seeing how they fit into my wardrobe! I’m pretty sure this won’t be my last pair of these trousers…

IMG_2324